
In our book Teaching with cases: A practical guide, Bill Schiano and I talk at a fairly high level about how to give effective student feedback by using a spreadsheet and personalized emails. Our argument is that by giving every student individual feedback in addition to the grade, you reduce the number of grade justification requests and complaints. This blog post is a detailed guide on how to do it – too detailed for the technically inclined, probably, but we all have to start somewhere.
You probably already have all the tools you need on your computer – a spreadsheet and an email client that works with your spreadsheet – such as Excel and Outlook, for example. (For myself, I use Excel and SerialMailer, a cheap serial mail client for Mac.) You can probably use online software as well, for instance a Google spreadsheet (which is nice because editing by more than one teacher is easy) and Gmail, though I have never tried it.
The idea is to use the spreadsheet to organize all your feedback, and to set it up so you use as little time as possible to give as much feedback as possible. I will demonstrate this, with an example for a fictitious course with three in-class sessions (with participation grading, 40% of grade), an individual written examination (30% of grade), and a group assignment (30%). I will show the various details of building the spreadsheet below – if you want to skip ahead and inspect the thing your self, I have made it available for downloading.
I start with a spreadsheet of students and email addresses, provided to me by the administration or downloaded from our LMS. Let’s say it looks something like this:

(If I have the time or can get the administration to create it from their databases, I ask to have first and last names in separate columns. For this demonstration, I won’t bother.)
Then I add columns for each of the assignments that I am going to grade:

(In this example, the individual examination has six questions, of which the students should answer four.)
For the group project, I create a separate sheet (in the same workbook, called “Groups”

The group sheet is exceptionally simple, just group number, points and comment. If you have several group assignments, this is where you will put them:
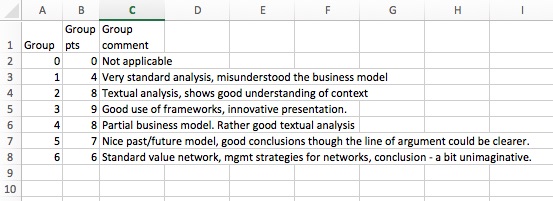
Note that I also create a group numbered 0. This is what I use for students who drop the course or don’t do the group assignment.
With that done, I assign students to groups in the Students sheet…

…and then I am ready to start teaching my course.
As the course rolls along, I enter points and comments for each student. As mentioned in the book, it is extremely important that you do the participation evaluation immediately after each class. I tend to give the students a score of 1-3, sometimes 1-6, with some definition. As I will show later, what scale you use does not really matter, as you can normalize them to whatever you want later in the process.
Anyway, assume the course is finished, and you have entered comments and points for everything – for the individual student, in the Student sheet….

…for the groups, in the Groups sheet:

To finish the evaluation part (we’ll get to communication later), you need to a) match the group points and comments to each individual student, b) calculate a final score for each student, and c) determine the letter grade for each student.
First: Group grades and comments. For a small class like this, this is probably a bit of overkill – you could just copy comments and points over to each individual student. But doing it the way I show here has the advantage (aside from being correct from a database administrator’s point of view) of error-correction (any error you make will be systematic and therefore easily spotted) and repeatable (the first time you do this, it is a chore, the second time, you just copy your previous spreadsheet and fiddle with it). Moreover, if you have a class with more than 40 students, a bit of “programming” saves time and effort. (I have done this for classes of 350 students, a situation where participation grading is not really possible – except as a small reward for exceptional students – but where the group feedback mechanism becomes extremely valuable.)
So, first – link individual students with their group’s scores and comments, using the LOOKUP function:

The formula is
=LOOKUP($E2;Groups!$A$2:$A$8;Groups!B$2:B$8)
and what it does is take the student’s group number (E2), look it up the first column of the “Groups” sheet (Groups!$A$2:$A$8), using fixed references to be able to copy the formula to the rest of the sheet, and displaying the group score (which is in column Groups!$B2:$B8). This nicely picks up all the group scores and comments:

We now have all the information for each student, then we have to calculate the various scores. We have the exam score already (the average of the exam points) and the participation score (a sum of the score for each session.) We now need to calculate the total points, which isn’t too hard: The max for participation is 9, for the others it is 10, so the formula for the total will be:
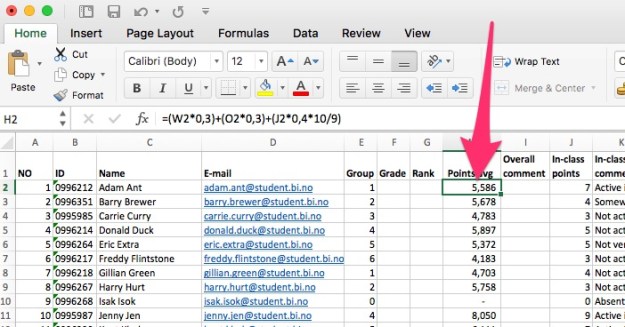
=(W2*0,3)+(O2*0,3)+(J2*0,4*10/9)
(I use comma as a decimal delimiter, parentheses for readability). We can now add a student ranking in the G column (students are always interested in this, so why not tell them?)

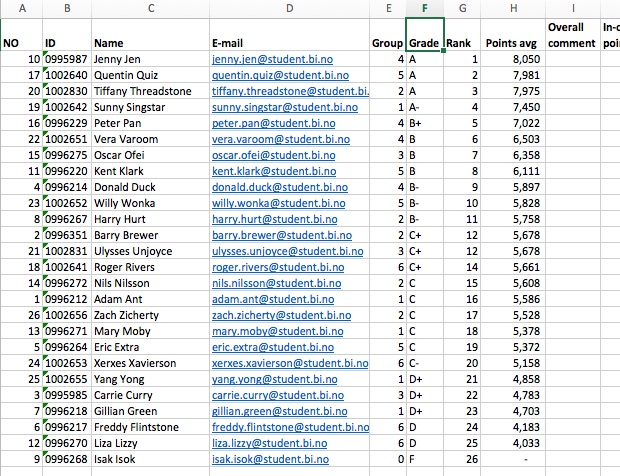
Now we are ready to set the grades. The simple way to do this is to sort the students by their scores (or rank, if you will):
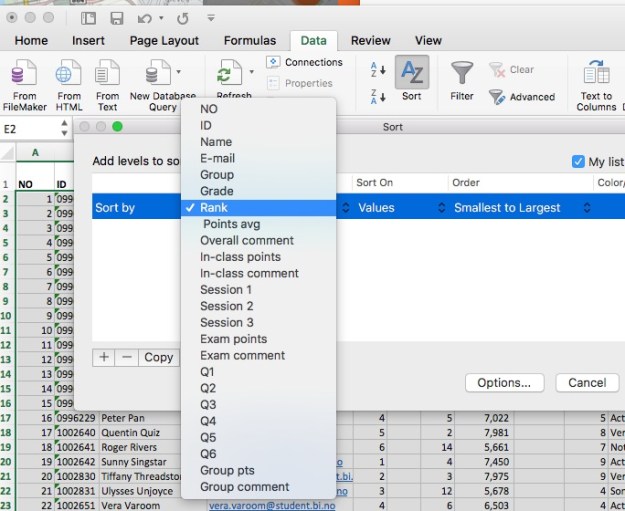
How you set the letter grades is up to you, of course, but it helps to have the students sorted. I set grades by starting at the top, trying to get a reasonable distribution, and make sure that I don’t use absolutes so that some unlucky student narrowly misses a better grade. Let’s say we end up here:
Now we are ready to communicate the results to the students. We will do that by writing a letter to them, composed largely of common text (i.e., feedback that is the same to all students), and them use the mail/merge function of word to merge in the individual details from the spreadsheet.

Example letter using SerialMailer
As said above, I use a product called SerialMailer on my Mac. The concept is simple: You write the letter, link to the spreadsheet, and insert field names into the text. When the letter is sent out (or printed), the field names are substituted for the values for each individual student.
Here is how to do it in Word (if you want to send it out via email, you need to have Outlook as well.):
First, open Word and write the letter:

(As you can see, I recycle much of my texts…)
Let’s start by replacing “student” in the opening salutation with the student’s name. Then you open the Mailings tab in Word and hit Select recipients from an existing list…

…and select your spreadsheet:

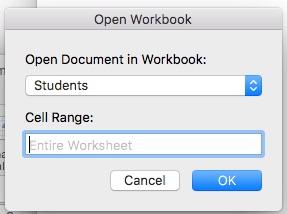
I get this message, click OK:

And open the “Students” sheet (i.e. the individual sheet):
If you click “Insert Merge Field” now, you should get a list of the column headings in the spreadsheet:

Delete the word “student”, choose “Insert Merge Field” and choose “Name”, and the field code will be in the document:

If you hit “Preview Results”, the code will be replaced by the content for each student:

Now write field labels and insert the fields you want to share with the students. I like to add the listing at the end of the letter, but you can do whatever you want:

Hit Preview, and this is what each student will see:

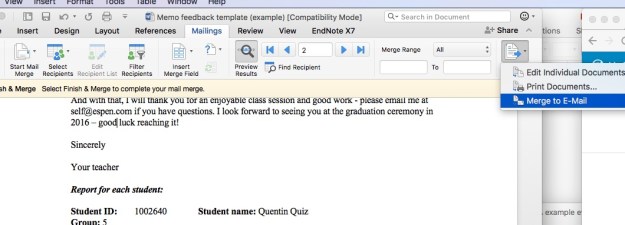
And there you go. Now hit “Finish and Mail Merge”, and select whether you want to print the documents on paper (or PDF) or send them out via email (shown).
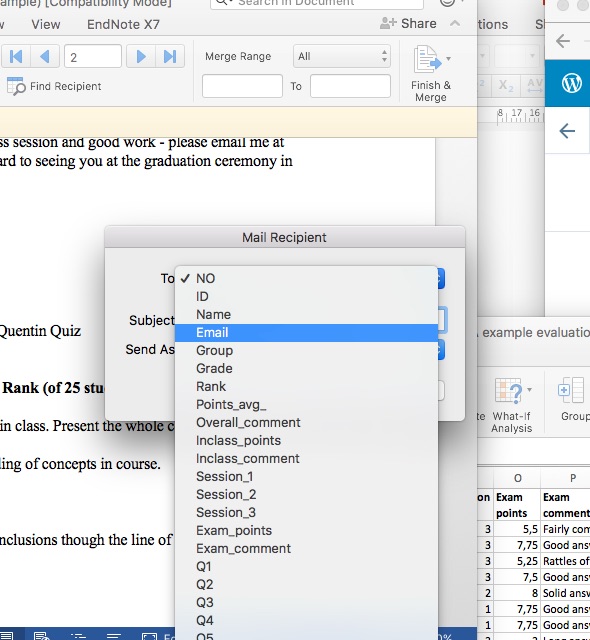
You must tell Outlook where the email addresses are in the spreadsheet:
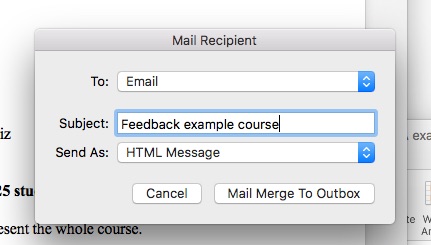
Then specify a subject and choose HTML Message (if you want formatted text):
…and, well, this is where I will have to stop, since I do not use Outlook. But trust me, it works well, the students love having individualized feedback, and it really isn’t that much more work than just providing the grade. As an added bonus: If students want a grade justification, you can just tell them that they already have it…
(Corrections and feedback welcome, of course.)

Pingback: Maskinlæring og akademisk rutinearbeid | Tversover